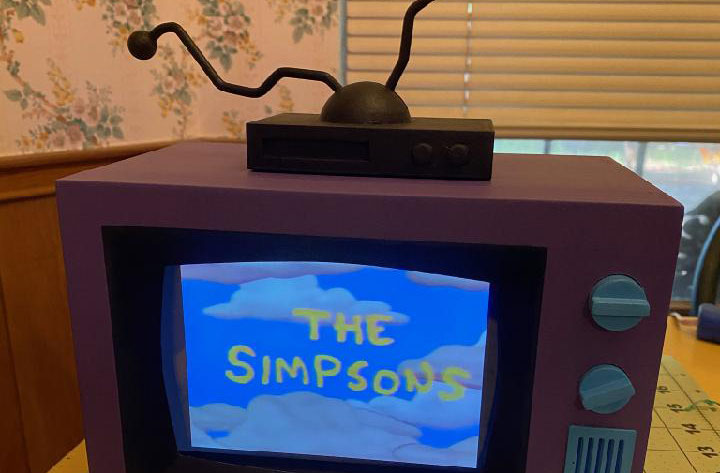

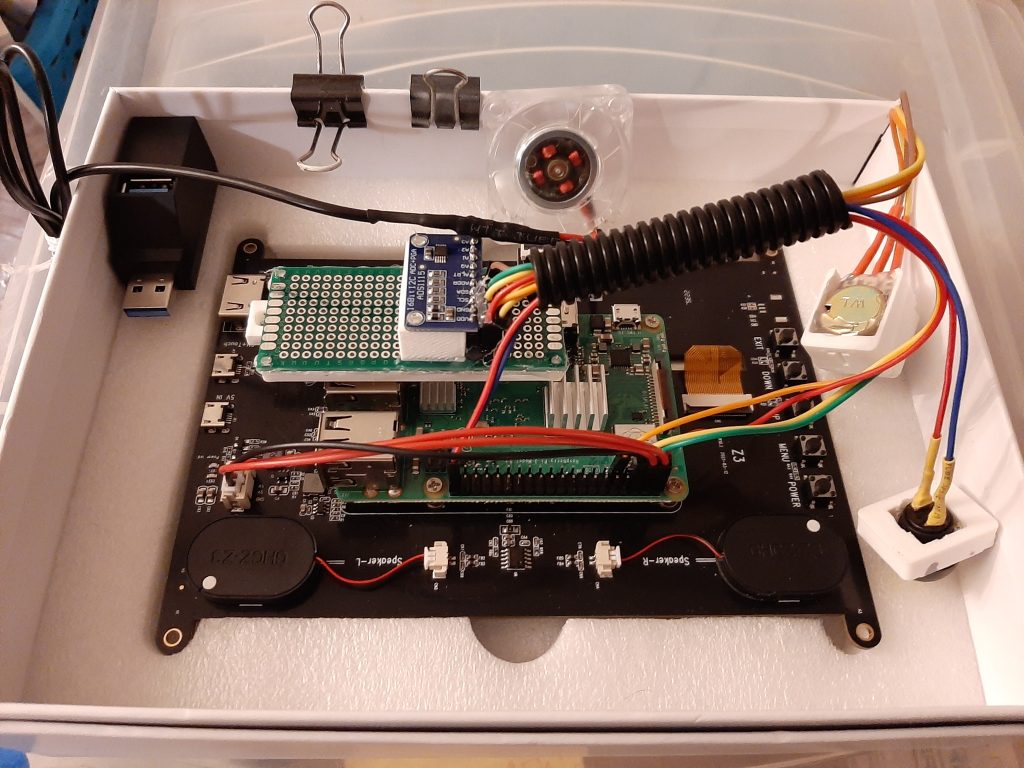
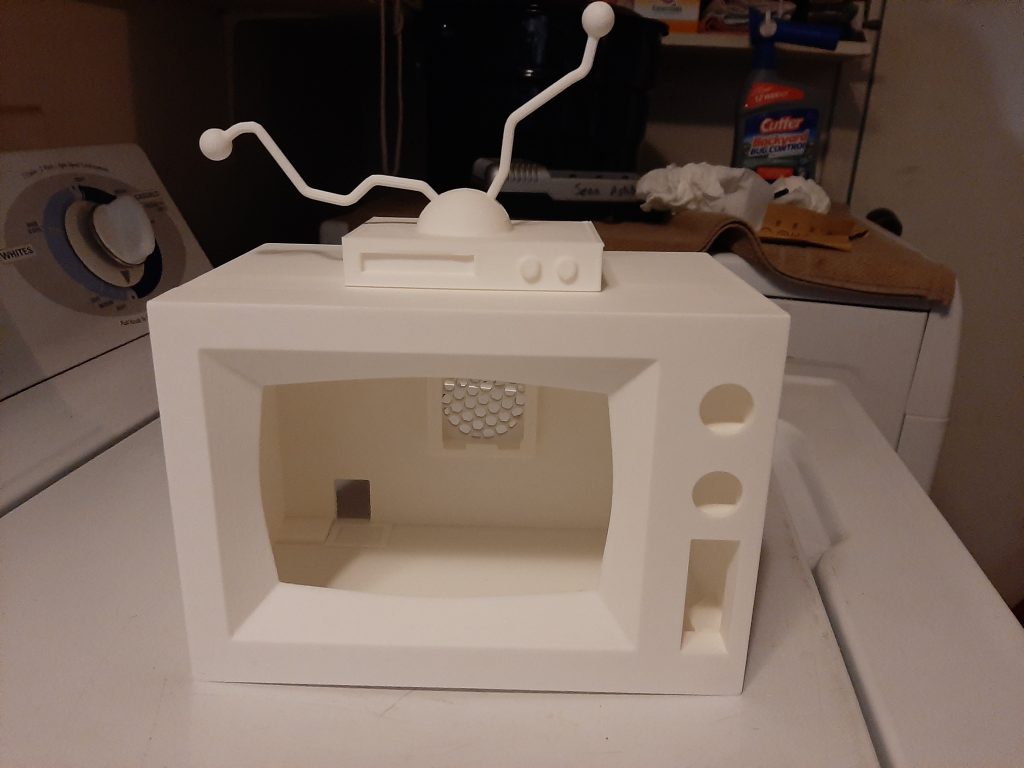
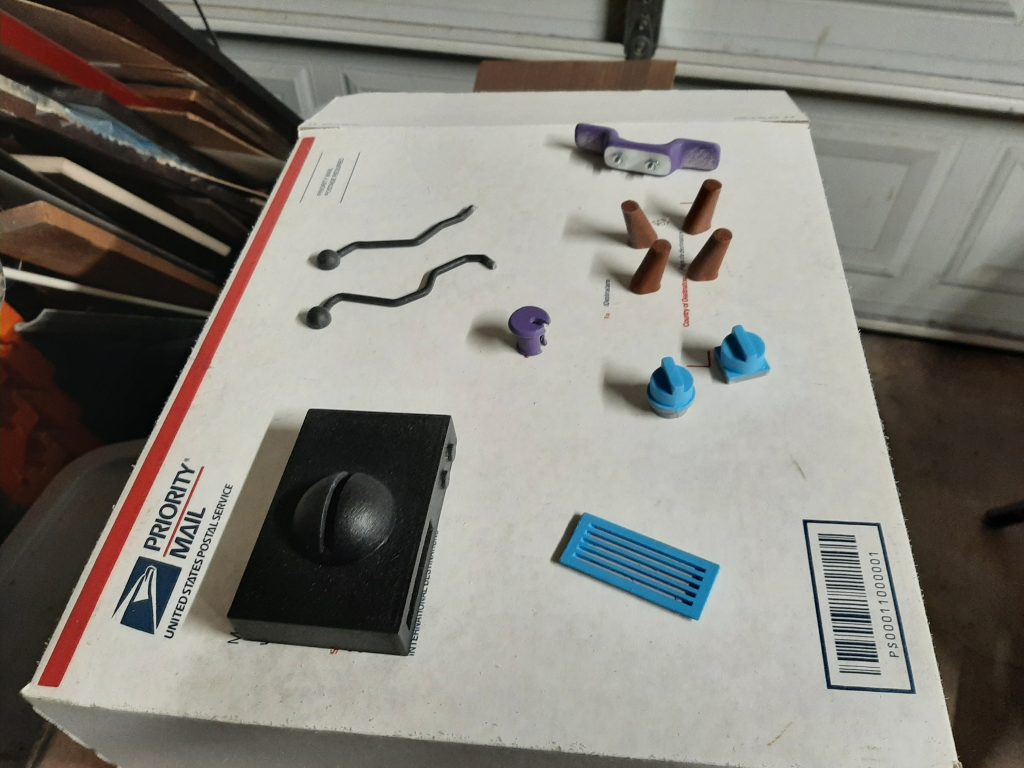
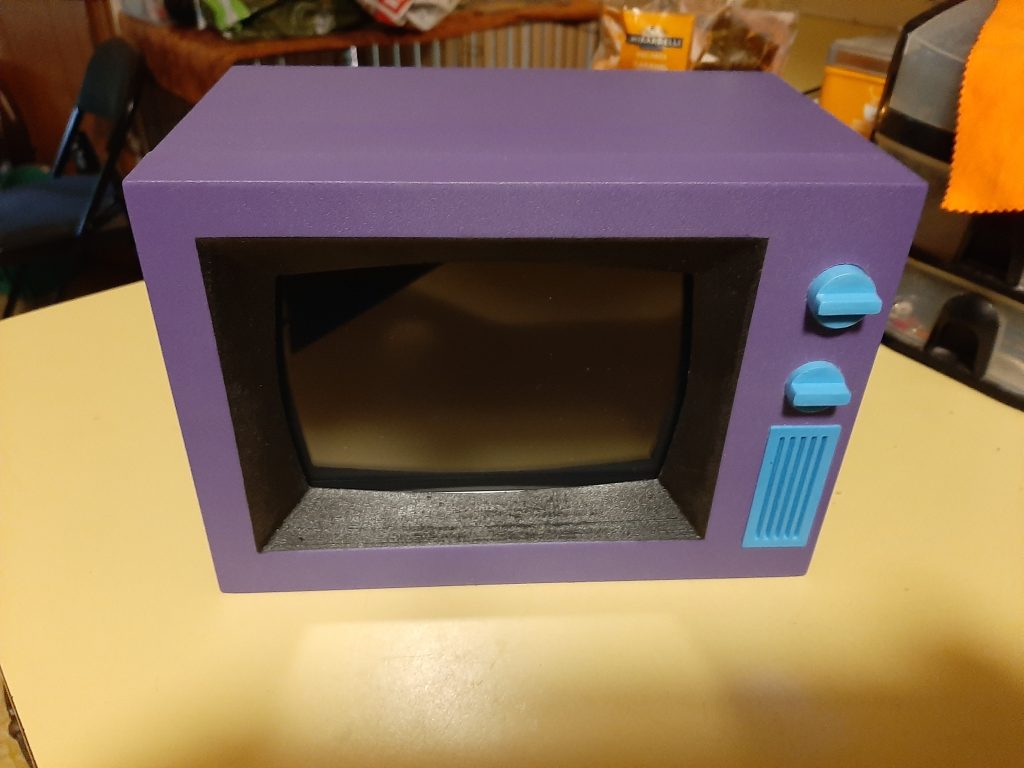
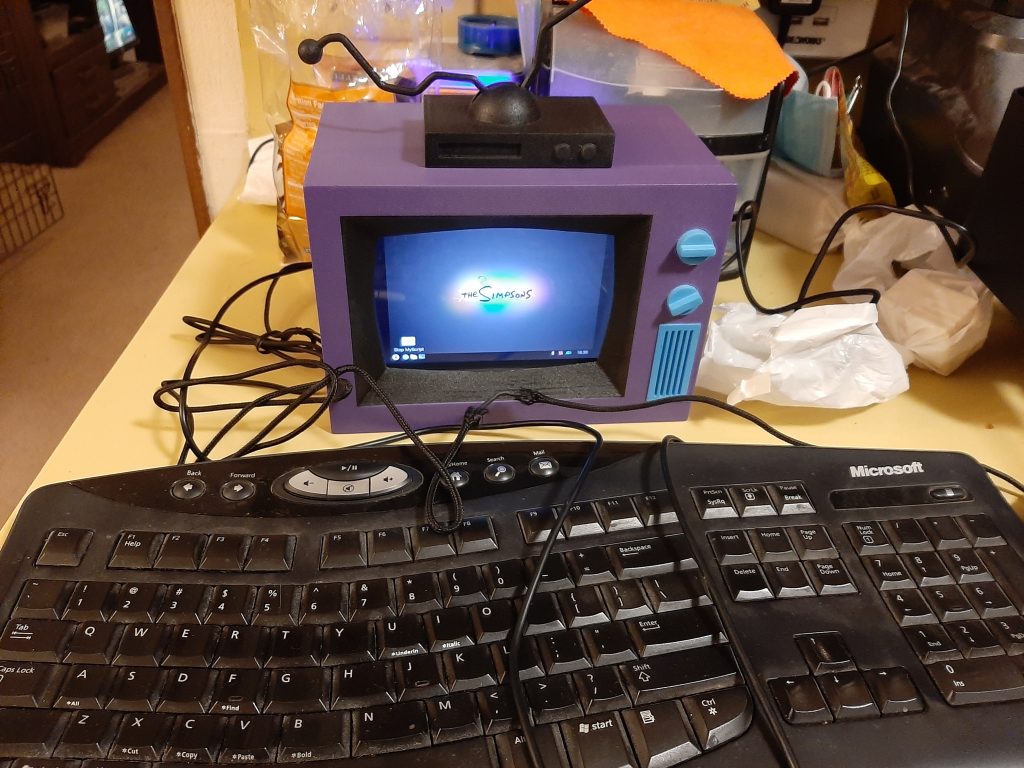
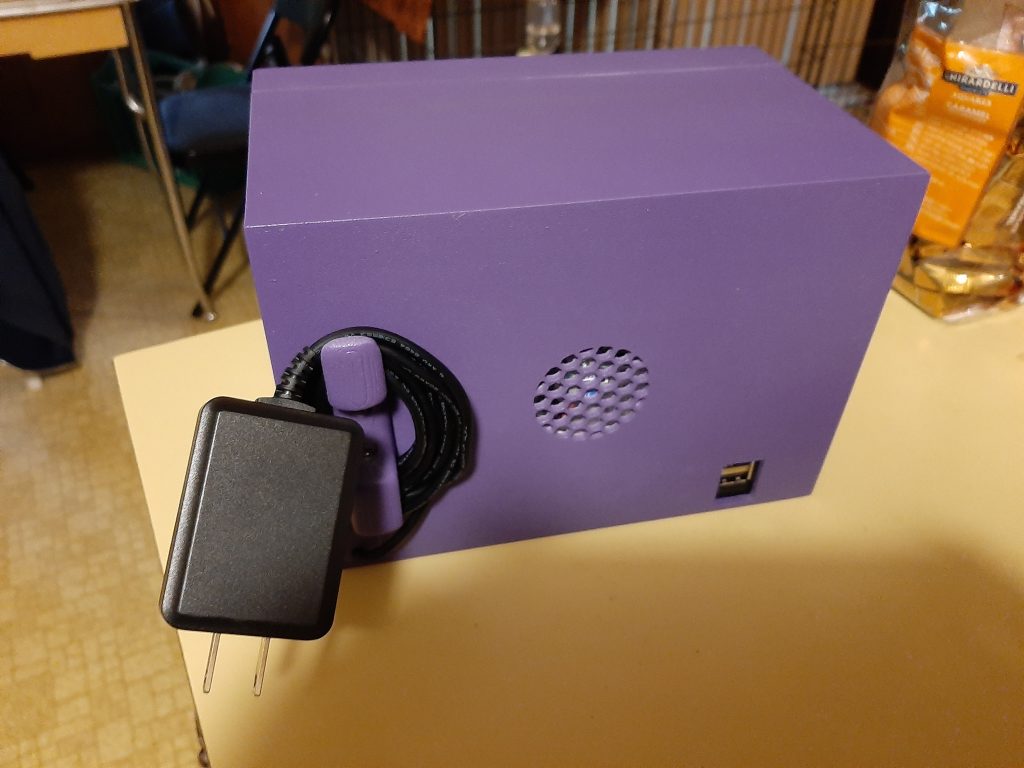
Had someone ask me to build a 3d printed Simpsons TV but a larger than ones already online. So after some searching I found the 3.5 inch version to be best for my needs and scaled it all up to 1.712 then added some brackets 3d model of the front face to fit the 7in screen I selected for the project. Made more changes to the CAD design in the back for added USB and lighted fan. Changed hole for the power cord with a hole plug and detachable wire wrap. Adjustments to the 3d print as needed for knobs to change to a momentary button and larger trim pot. Also made my own antenna since one wasn’t included and closed up vcr since I didn’t add the extra functions. It does still function as a raspberry pi with WiFi Bluetooth etc with control by adding keyboard and mouse to the added usb port. The monitor had speakers already so no need for amp or speakers. The monitor comes with cables to connect to different Pis. Will have to do some soldering for the knobs and the digital converter to make volume work and to connect fan with usb but after that its 2 usb from Pi to fan and dual usb port and the power cable coming in.
I also included the code I used. This was my first time working with pi so can maybe be done better but this works fine. I used Pi OS with desktop so could still be used as Pi and use Bluetooth speakers and internet if wanted etc.
More info and 3d printable files make your own at link below.
https://www.printables.com/model/484859-simpsons-tv-remix-7in-screen-plus-backlight-fan-an
Here are the non 3d printed parts I used. Pretty expensive build but came out nice. Main costs were the monitor and Pi rest you may have laying around if this is what you do lol:
FULL DISCLOSURE: I am a Amazon Associate and these are my associate links. I may get pennies if you buy something. Yeah me. That said this is a list of what I used for the project.
Main Components:
NORSMIC Raspberry Pi Screen, 7 inch Monitor, IPS HD 1024×600, Responsive Capacitive Touch,Dual Built-in Speakers,HDMI Input,Compatible with Various Devices and OS,Easy Assembly,Driver Free
LoveRPi Raspberry Pi 3 B+ Computer with Heatsinks
GeeekPi 4pcs Raspberry Pi 4 Quiet Fan, Raspberry Pi Cooling Fan 40x40x10mm 4010 Fan DC 5V 3.3V Brushless CPU Cooling Fan Cooler Radiator for Raspberry Pi 4 Model B, Raspberry Pi 3B+/3B/2B (Blue)
USB Hub,3 Port USB Splitter,USB 3.0 High Speed Splitter for Surface Pro,XPS,Notebook PC,USB Flash Drives, MacBook, Mac Pro/Mini,iMac, Mobile HDD…
For OFF Button connect to pi:
Gikfun 12mm Waterproof Push Button Momentary On Off Switch 5 Colors DIY Kit for Arduino (Pack of 10pcs) EK1925
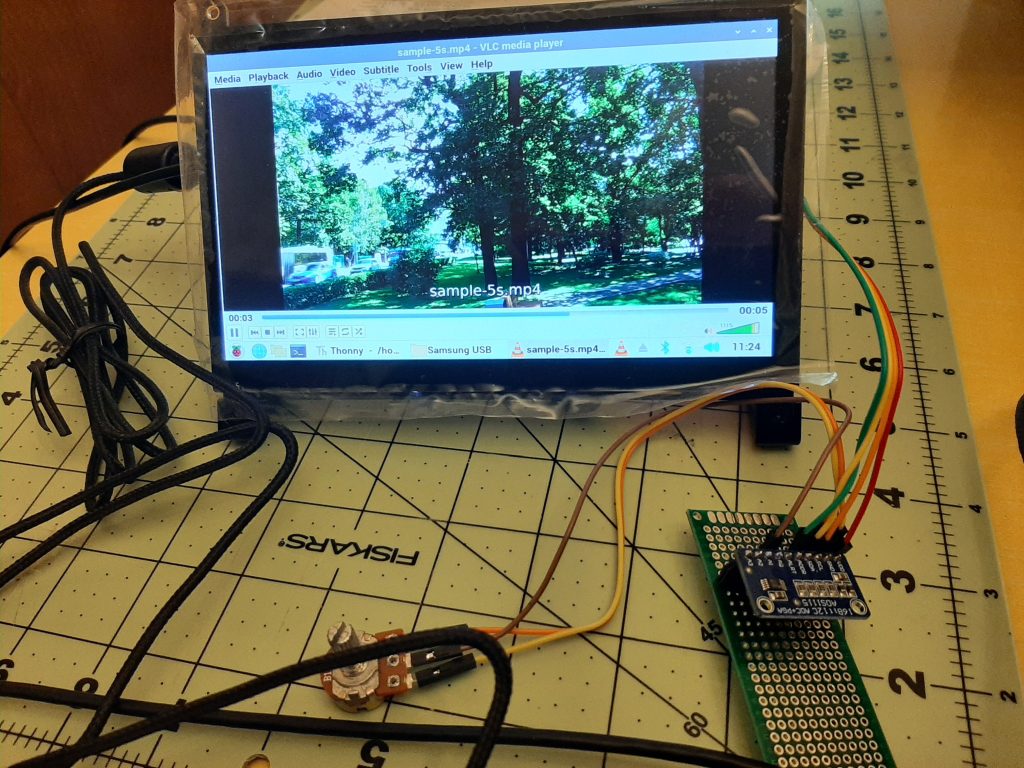
For Volume connect the converter to the pot and the pi using the PCB and hot glue to Ethernet add on:
Hilitchi 25 Pcs Complete Models Potentiometer Assortment Kit with 5K-100K Ohm Knurled Shaft 3 Terminals Linear Taper Rotary Potentiometer w Knob Nuts and Washers
HiLetgo 3pcs ADS1115 16 Bit 16 Byte 4 Channel I2C IIC Analog-to-Digital ADC PGA Converter with Programmable Gain Amplifier High Precision ADC Converter Development Board for Arduino Raspberry Pi
Smraza 101pcs Double Sided PCB Board Kit, Prototype Boards for DIY Soldering and Electronic Project Circuit Boards Compatible with Arduino Kits, 30PCS 40 Pin 2.54mm Male and Female Header Connector
Also needed a GOOD raspberry pi power cord to avoid low voltage warnings.(ill add when i find link lol) A 64gb mirco sd card, jumper wires, couple of usb extenders(one for dual USB and one to cut and attach to fan), solder, the ability to solder, code and paint.
It took me about 3-4 weeks of tweaking testing etc to get it all fitted and working but should be alot easier now. I plan to make a full write up when I have time. Its a fairly simple build now and a great looking case for raspberry pi.
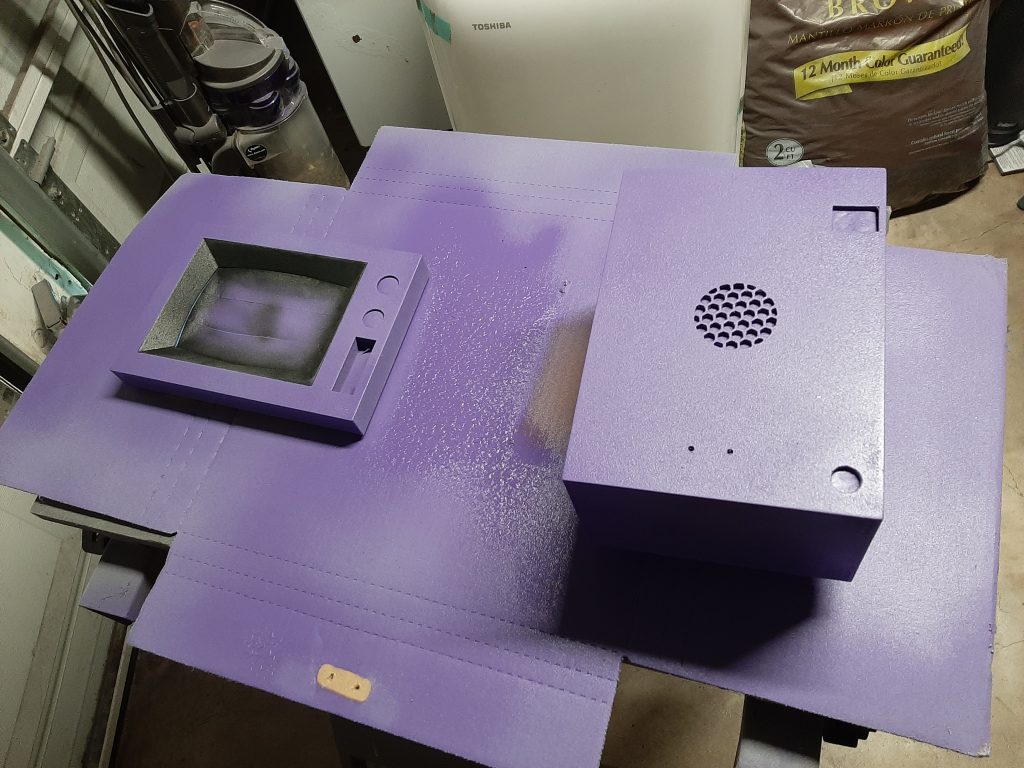
Print main case with supports everywhere but at like 45 to 50 angle for minimal but needed supports. I use normal and concentric and they come off fine for me with little clean up. I also used supports on knobs and face etc as needed but. Print the Ethernet port part on flat side with support from plate.
All the parts printed once except feet
I also used for some parts:
https://www.thingiverse.com/thing:516549 usb cable plug
https://www.thingiverse.com/thing:516549 ethernet port plug